It is convenient, practical to have a basement in a private house; it saves money on the construction of a separate underground structure. At the same time, descending stairs with heavy loads is difficult and dangerous. If you make a lift for the cellar with your own hands, such problems will be solved. This process is rather complicated, but with knowledge of the theory of the issue and the ability to use household tools, anyone can build a homemade lift into the cellar.
Features of the manufacture of an elevator for a cellar
When planning the manufacture of a home elevator, you need to understand that this is a heavy structure that needs a solid, reliable support and foundation.
When making a lift to the cellar with your own hands, you must follow these rules:
- Observe the manufacturer's instructions for the components that will be used during assembly.
- To equip a powerful foundation, designed for the weight of the frame, equipment, people and cargo, plus a reserve of at least 30%.
- It is allowed to fix the guides only on concrete or brick walls with a thickness of two stones or more.
- Have sufficient space to accommodate the cab and platform. These are quite voluminous structures that require a lot of space.
Consideration should be given to the likelihood of a power outage or sudden failure of one of the mechanisms. For such cases, a portable or stationary ladder and a rechargeable light source should be prepared. Another effective solution is a hand winch. The ascent and descent will be slower, but the lift will remain operational.
Home lift requirements
To make a do-it-yourself cellar lift, you need to carefully study the structure of this structure, and the requirements that apply to it.
Standard elevators consist of the following parts and mechanisms:
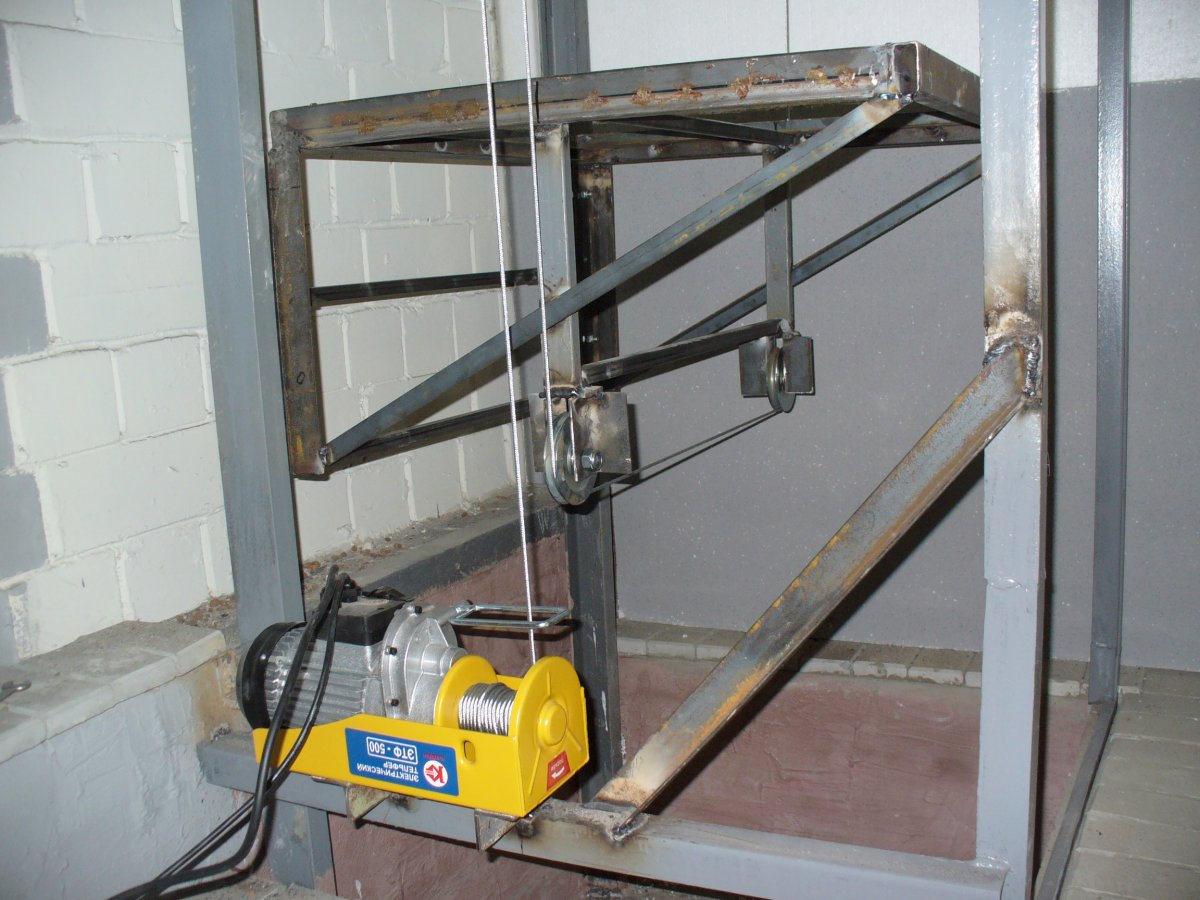
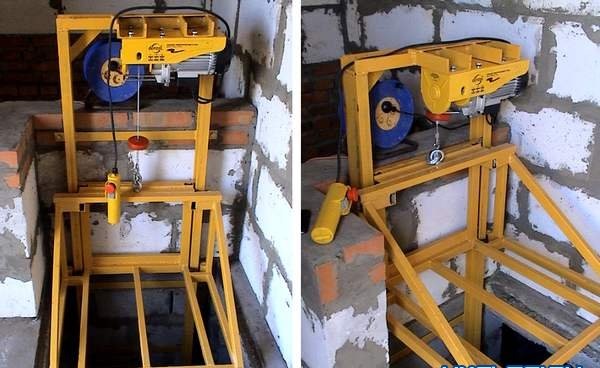
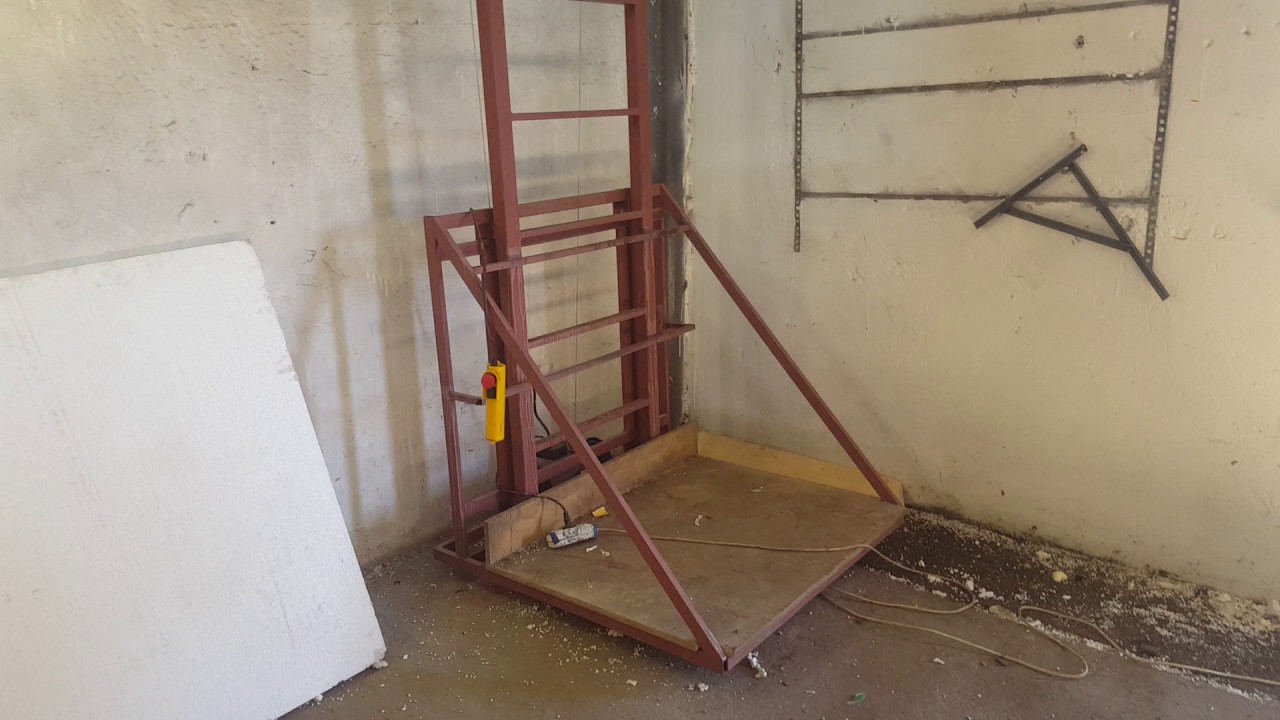
- Lifting device. Powered by hand or electricity.
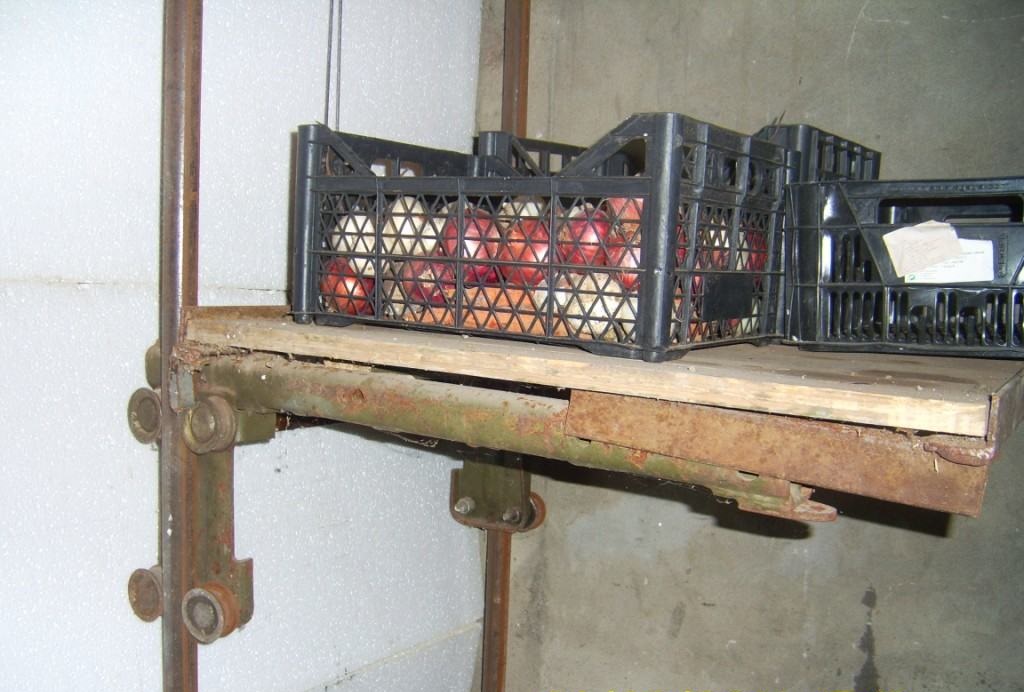
- Platform. The base that serves to accommodate the movable fragment.
- Cabin. Designed to accommodate people and cargo. It can be open and closed.
- Rails. They are mounted on the wall and serve as guides for the movement of the cab.
- Governing bodies. These include starters, relays, fuses and other parts that regulate the operation of the structure.
A homemade elevator to the cellar must meet the following criteria:
- safety;
- sufficient carrying capacity;
- ease of use;
- profitability;
- availability of an insurance system;
- aesthetics;
- durability;
- the ability to do it yourself.
When choosing a control method, it is recommended to use a remote control with buttons for raising, lowering and emergency stop.
Types of elevators to the basement
The lift to the basement can be equipped with various types of drives, differing in the principle of action of the applied force.
Electrical installations are equipped with a motor, gearbox and winch. The movement of the cab is carried out by winding and unwinding the cable from the drum. To ensure smooth movement and reduce the load on the motor, the platform is equipped with a counterweight, the mass of which corresponds to the moving part or slightly exceeds it. The system is reliable, but subject to rapid wear due to the presence of many parts rubbing under load.The device emits a loud noise that can be heard in all corners of the building.
Hydraulic lifts work quietly, the load is lifted by a piston, into which a special fluid is pumped through a high-pressure hose. The power plant can be placed from below, from above, including away from the mine. In the event of a power outage, the installation of hand pumps is provided. The disadvantage of this solution is the likelihood of hose ruptures and oil contamination of the entire basement.
The pneumatic lift moves by creating a vacuum in one of the chambers under the influence of pressure pumps. The devices are safe, reliable, but rarely used. This is due to their high cost, insufficient capacity and difficulty in maintenance.
Mechanical lifts can be considered as an option. To move the cab, muscular force is applied to the drum. Long handles or large steering wheels are used to increase torque.
Preparing for installation

The success of all subsequent actions largely depends on the correctness of the preparatory stage of work. First you need to choose the type of elevator, decide on the place of its installation, draw up a detailed diagram. Then you need to make calculations and purchase the necessary property.
To build an elevator to the basement with your own hands, you will need the following tools:
- welding machine;
- Bulgarian;
- puncher;
- screwdriver;
- spanners;
- electric drill;
- roulette;
- square;
- soldering iron;
- screwdrivers;
- level;
- paint brush.
List of materials:
- channel;
- rails;
- steel corner;
- drum;
- cable;
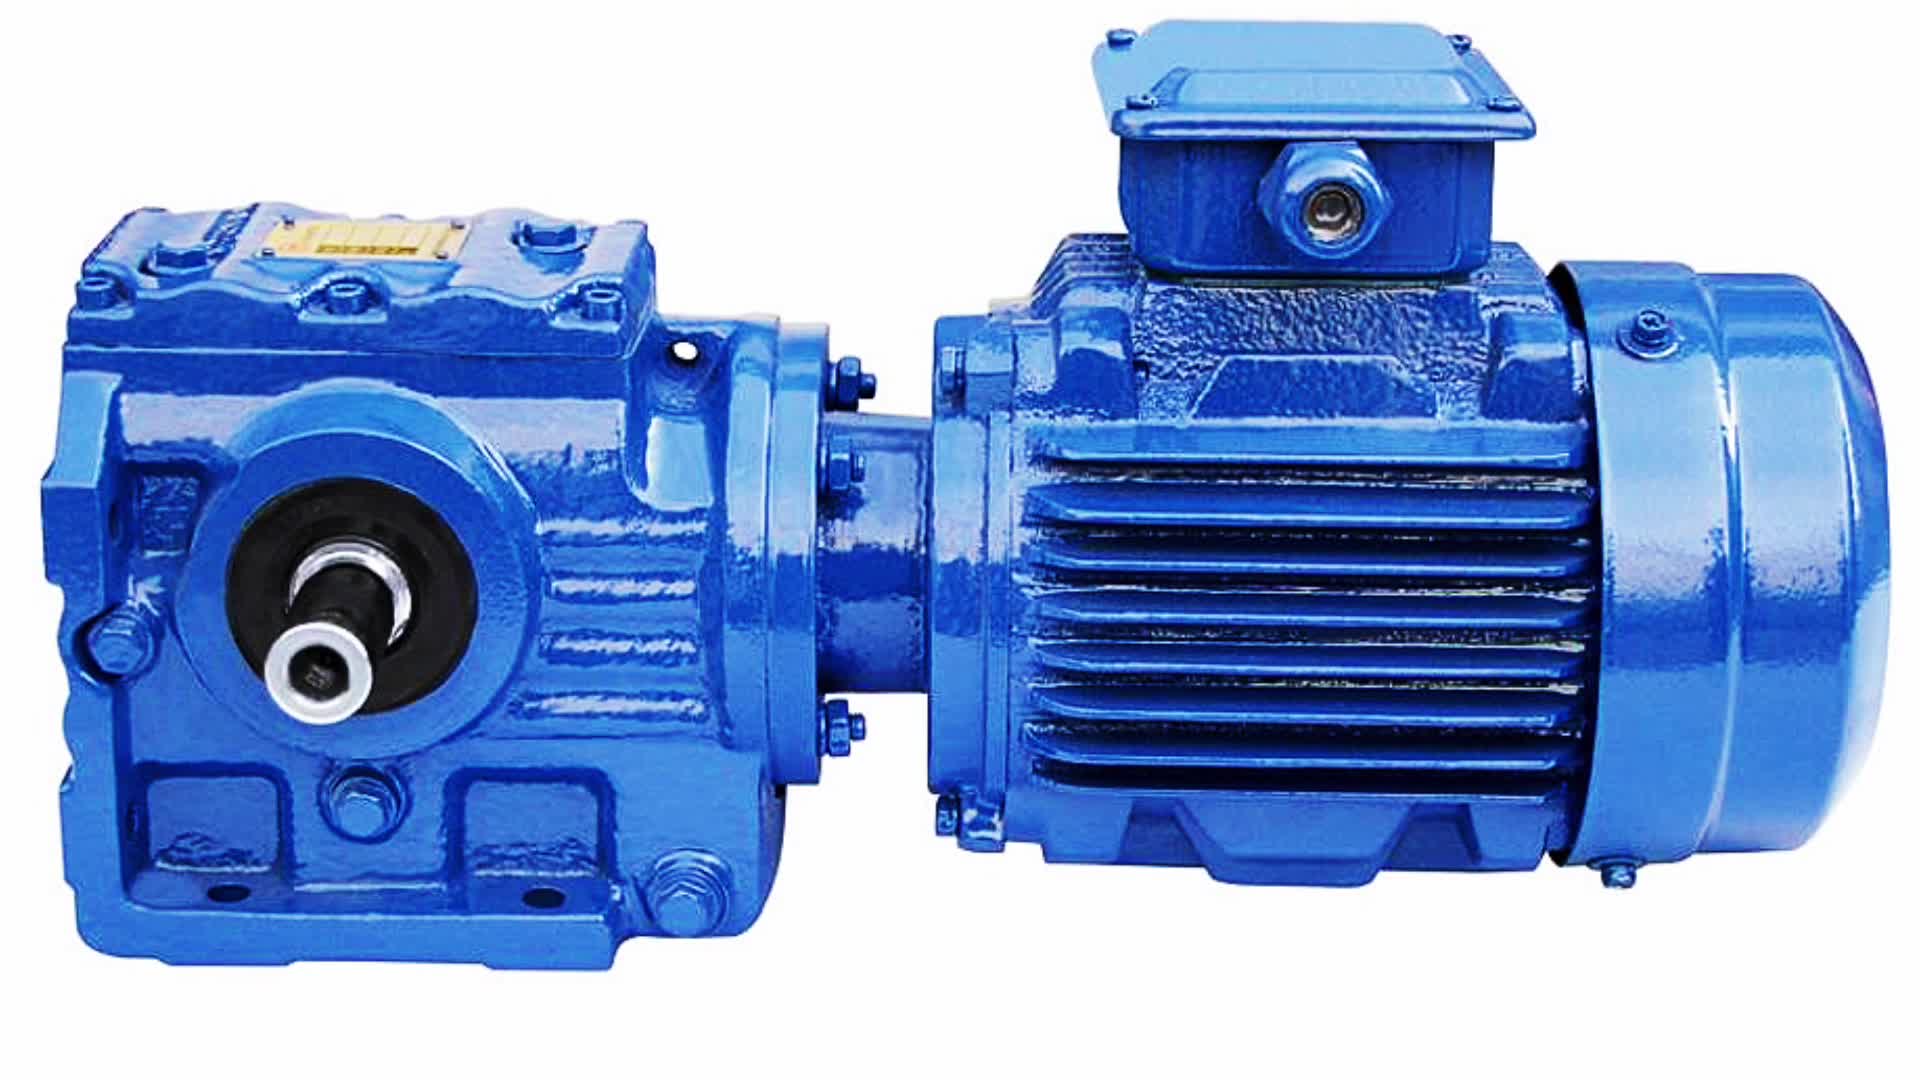
- worm gear;
- videos;
- telpher;
- Electrical engine;
- winch;
- power cable;
- actuator;
- shaped pipes;
- anchor bolts;
- mounting boxes;
- acrylic paint;
- anti-corrosion agents.
You need to think about safety issues in advance. Provide effective ventilation, lighting, respirator, hard hat, goggles and gloves.
Place for an elevator
The finished lift must provide a comfortable operating environment. The design should help, not interfere with economic activities.
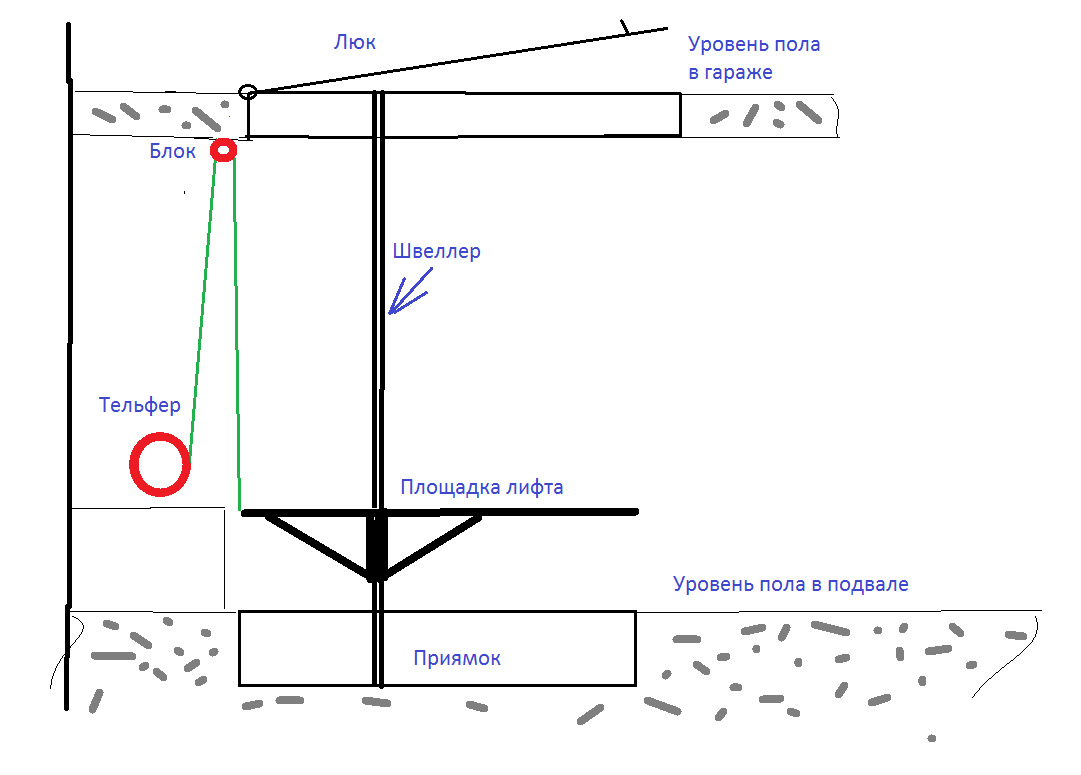
First of all, it is necessary to provide for the issues of ensuring and maintaining the strength of the supporting structures of the structure. The total weight of the elevator together with the load can reach a ton, and this is a large load on the floor and walls of the cellar. The best option is considered to be a monolithic reinforced concrete box, where all the component parts have a sufficient margin of safety, and the additional weight is evenly distributed over the slab. The minimum thickness of the slab is 10 cm. If this indicator is less, then it will be necessary to reinforce the base.
There are such options:
- Make an external tunnel under the foundation. Place several large stones in it and fill them with cement mortar.
- Drill four holes in the slab, make an expansion on top. Fill the wells with fittings and fill them with concrete.
- Equip an additional 5-10 cm thick screed over the existing base.
- Fix and putty the reinforcement grating on the walls. Another way is to fasten two reinforced concrete posts with anchor bolts.
The best place to install an elevator is in the corner of the cellar. There the floor is stronger and there are two walls for attaching the rails.
Arrangement of an elevator in a private house by yourself
Mounting the lift may require the help of a partner, as you will have to deal with rather heavy objects, and support for fixing them will also be required.
Construction should be carried out in the following sequence:
- Apply markings to the floor, ceiling and walls in accordance with the project. Recheck their accuracy, compare the horizontal and vertical lines.
- Make a frame for the movement of the cargo compartment.A closed loop is made, which is rigidly attached to the supporting structures of the building. Rails are attached to the frame as guides for the rollers.
- Assemble the cockpit. A channel for the frame and a reinforcing grill for the floor are used. The structure is equipped with a handrail and a swing door. The walls are covered with steel mesh if necessary.
- Install the support beam onto the frame. Then attach the power mechanisms of the engine, gearbox, winch and clutch to it.
- Connect the lifting device and the cab. Connect the cable and band brake.
- Check the quality and reliability of connections, eliminate curvature and backlash.
- Remove scale and rust from metal. Treat it with anti-corrosion agent and paint.
- Supply electricity. Make channels for the cable, fix the junction boxes, consoles and switches.
- Test the device in different operating modes, with the maximum load. Check the operation of the protection in case of loss of light and the operability of the emergency braking device.
At the end of the installation, you need to go up and lower the cab to the lower position in order to relieve the load from the supporting structures.


