The underfloor under the garage and private residential building is convenient, practical and economical in terms of construction costs. The owners do not need to go outside to get supplies, just open the hatch, go down to the cellar and take everything you need. Comfort and safety of operation is largely determined by such a detail as a basement cover in a house. To make a hole in the cellar with your own hands correctly, you need to take into account a number of features regarding the choice of materials and mechanisms for opening it.
What to consider when building a hatch
The lid to the cellar in the house is a demarcation structure between the damp, cold underground space and the microclimate of the living quarters. In the underground there is always high humidity and an inevitable specific smell.
Basement access must meet the following requirements:
- strength;
- tightness;
- static;
- presentability;
- low thermal conductivity;
- ease of opening;
- resistance to moisture and temperature differences;
- durability.
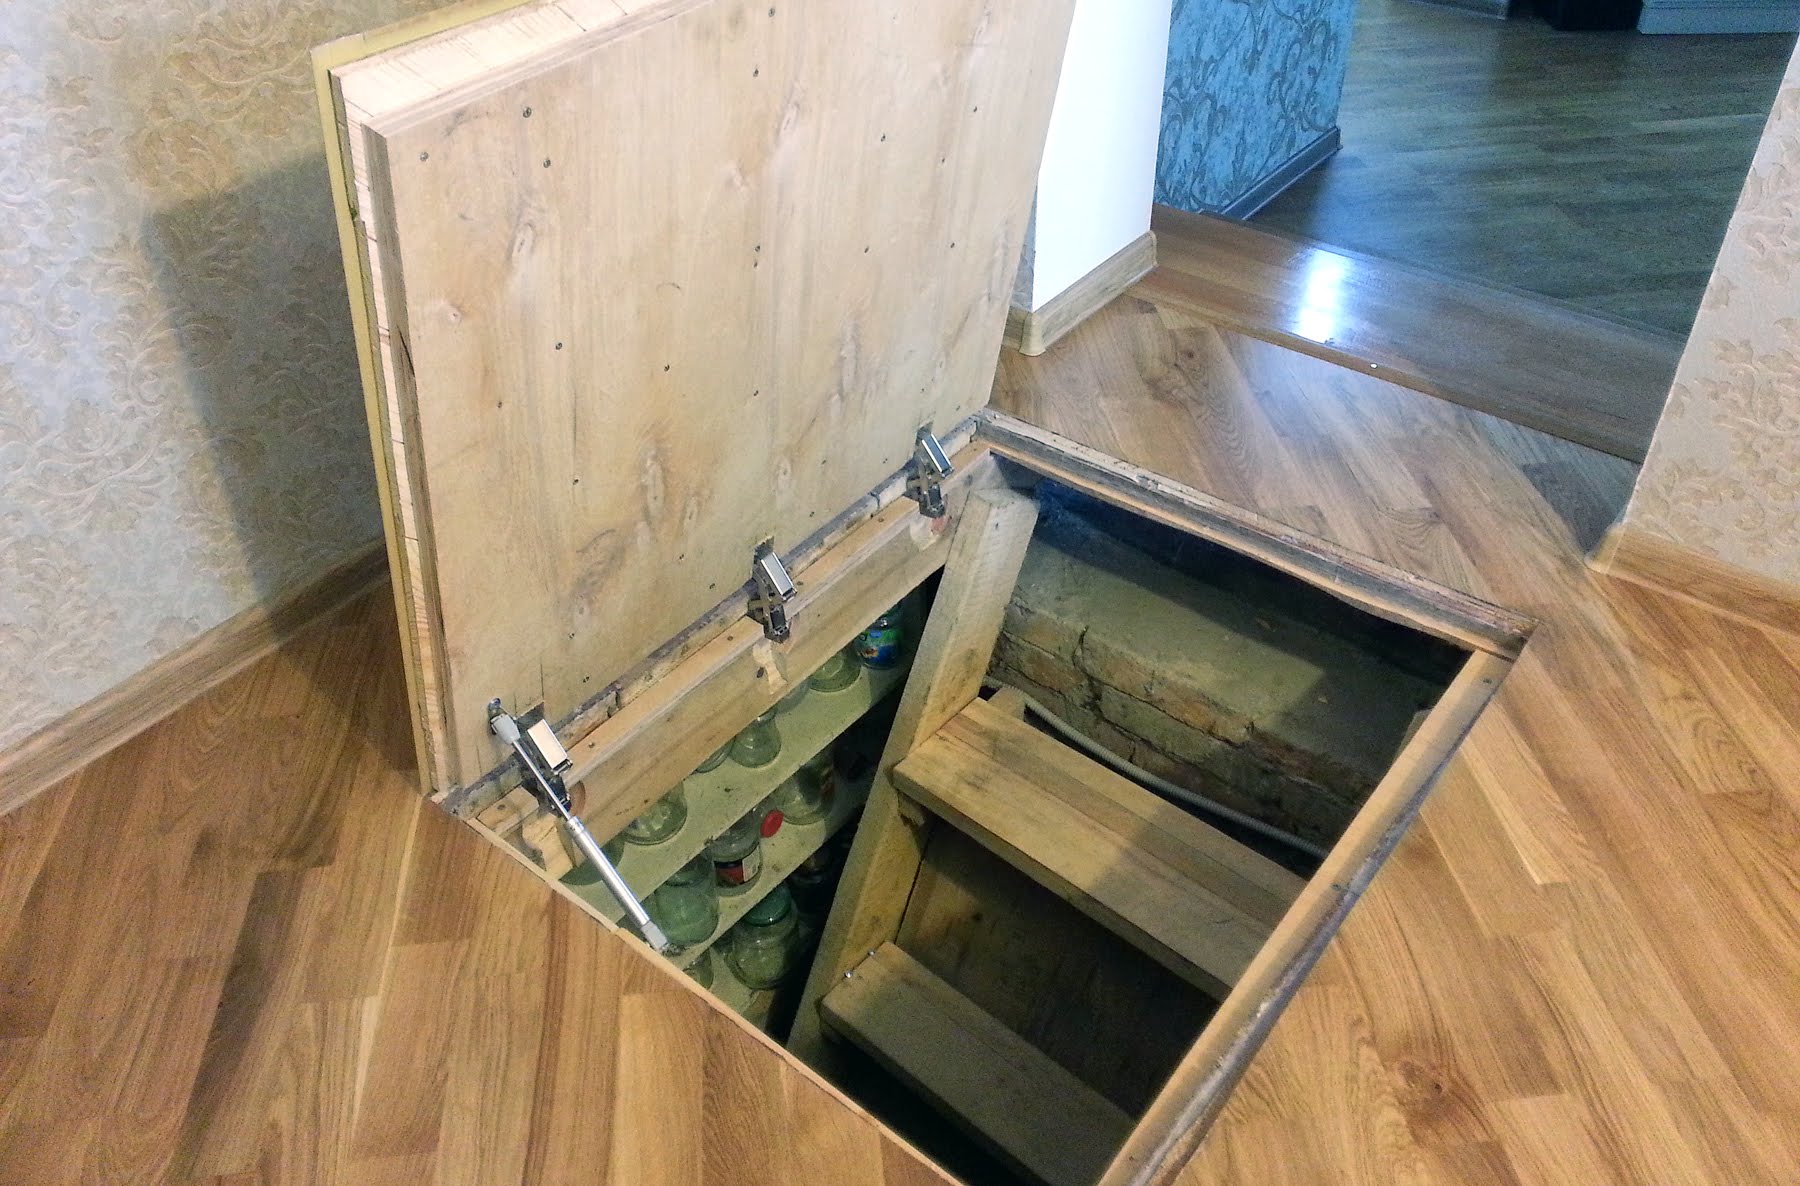
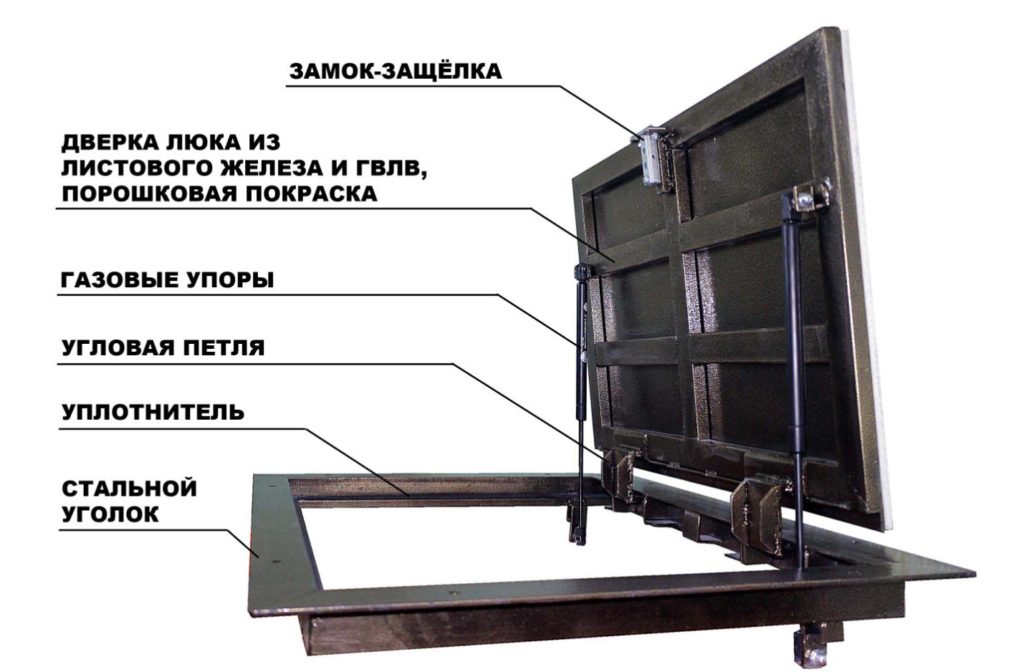
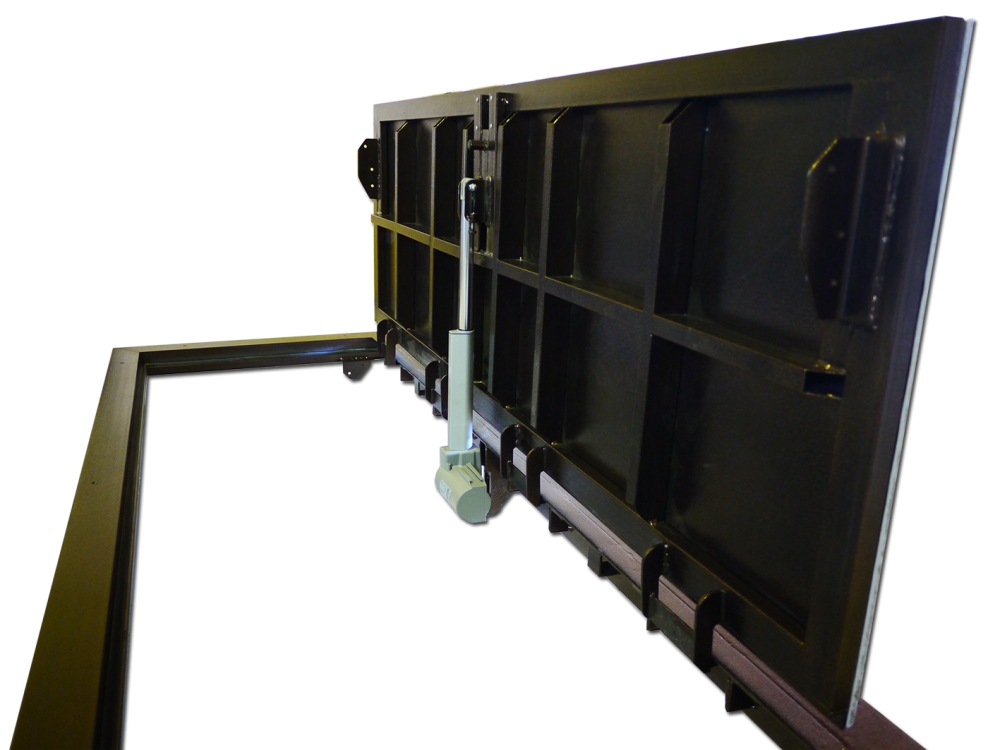
For convenience and safety, the do-it-yourself basement cover is equipped with stops, clamps and gas shock absorbers. If the weight of the structure is too heavy, it is equipped with an electric lift.
Manhole types
When planning to build a vestibule-manhole into the underground cellar, you need to correctly choose a place for its installation, so that you can get into the underground without hindrance, without moving furniture or blocking the passage. Manhole designs are categorized according to several criteria.
By form:
- square;
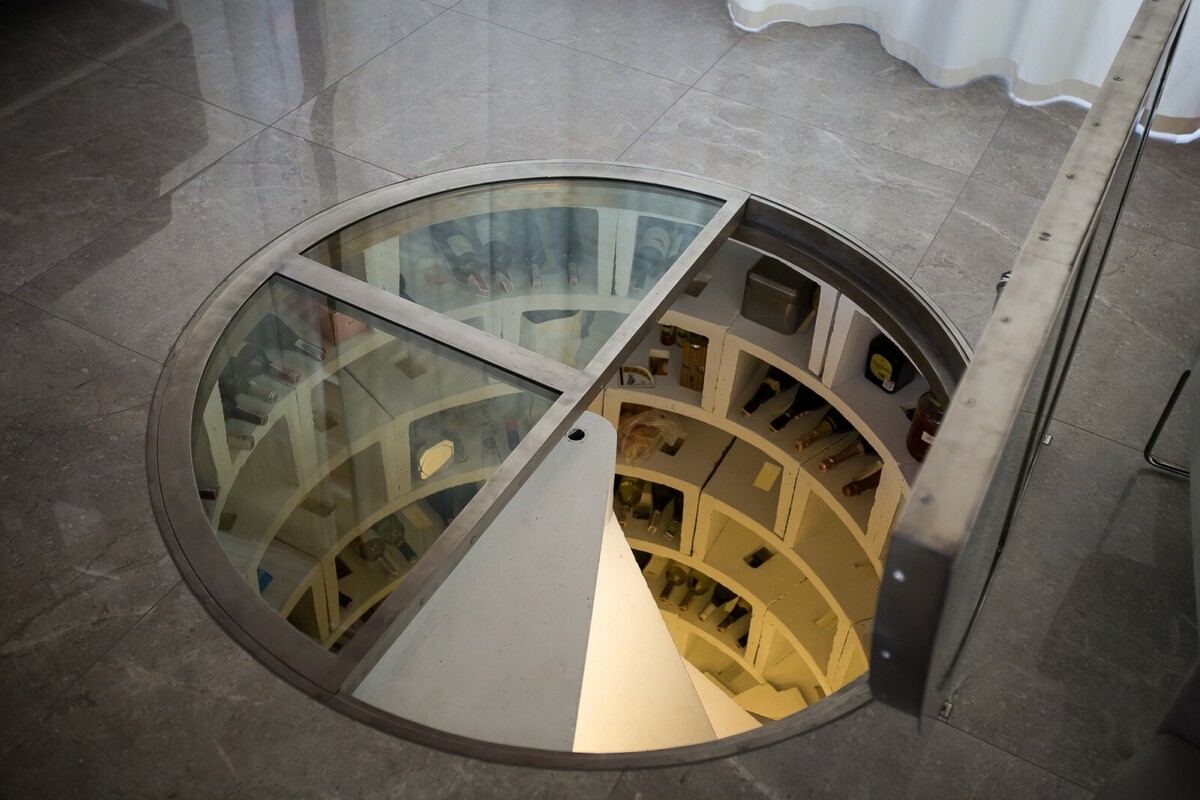
- round;
- rectangular;
- multifaceted;
- semicircular.
By opening method:
- manual;
- mechanical.
By material of manufacture:
- wood;
- metal;
- combination.
According to the experience of private developers, a hole in the cellar of 0.6x0.8m is considered the most optimal option. Such dimensions are quite compact, while allowing you to freely descend and ascend into the underground, including with a load.
Choice of materials
The lid for the cellar is made with your own hands from materials that successfully resist the effects of damp and cold, strong enough not to deform under the weight of the heaviest occupant of the house. This requirement is fully satisfied by sheet metal, chipboards and boards with a thickness of 20 mm or more.
Hinges are made by yourself or purchased in the store. It is advisable to take products made of aluminum, which, with sufficient strength and reliability, are absolutely immune to dampness. In addition, a stopper, a shock absorber and a seal are compulsory door accessories. In any case, insulation is carried out.
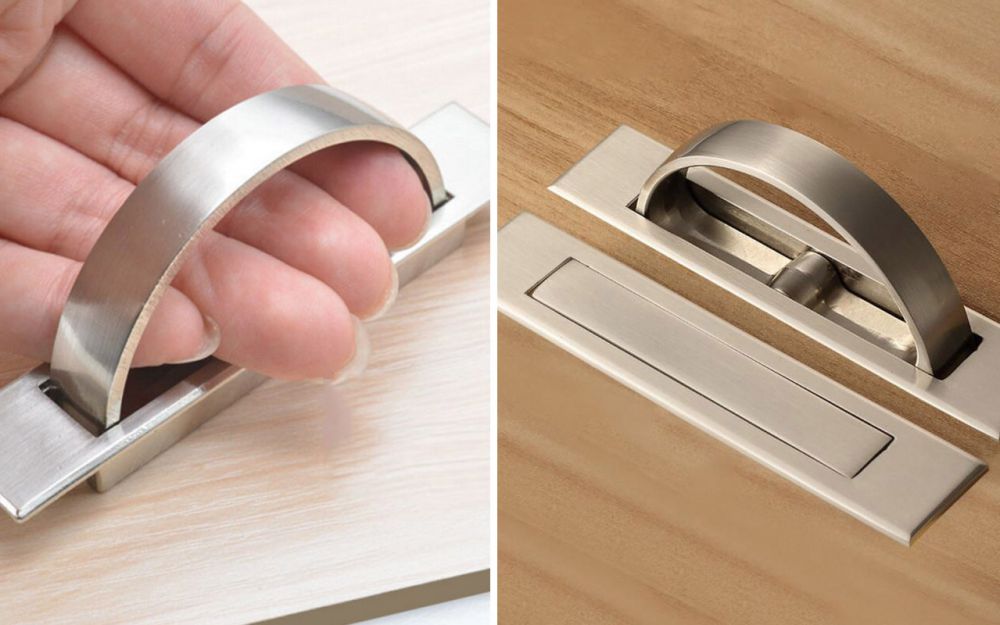
The handles are folding, retractable or removable. It is advisable to install a latch-lock. This device performs not so much a security function as fixing the canvas in a static position, preventing its movement and unwanted sounds from air movement.
How to make a wooden cellar hatch
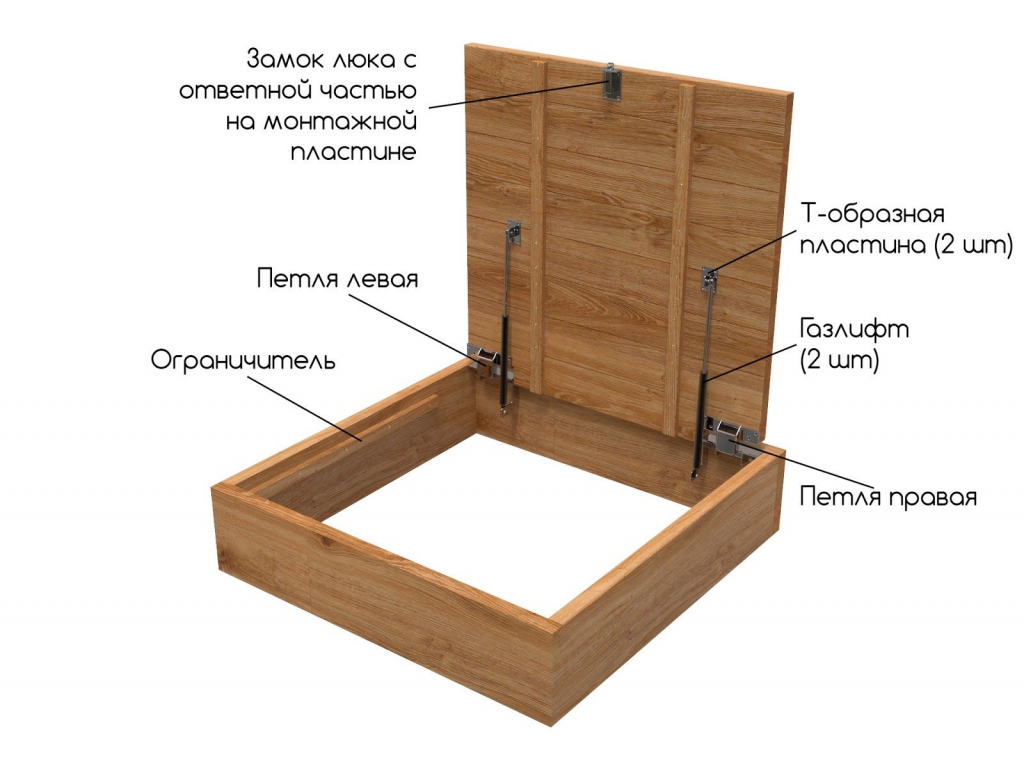
Installation sequence:
- If the floor is concrete, an opening of the corresponding shape and size is cut out with a grinder.
- Arrangement of the entrance box and hatch loot. The supporting structure is bolted to the concrete with anchor bolts.
- Cover making.Better to use grooved boards with sealant applied to the grooves. You need to install an aluminum corner around the perimeter.
- Attaching loops. After that, the lid is tried on to the box and both products are connected together. If there is linoleum or laminate on top, the hatch is recessed to the depth of the finish coating.
In conclusion, the installation of related parts is carried out - the handle, stop and shock absorbers.
Making a hidden metal hatch
Work algorithm:
- Make a drawing where all parameters are calculated with millimeter precision.
- Assemble and fix the frame in the opening. As with wood, it must be firmly anchored in the floor board. If it is made of boards, the loot should be attached to the logs, and props should be placed under them.
- Weld the door frame from the corner. First, tacking with dots is done, then correction, and then the final seams outside and inside.
- Attach the canopies and base for the stopper. Measure the cover against the frame, mark the holes for drilling.
- Insulate the hatch. For this, extruded polystyrene foam with a thickness of 50 mm is best suited.
- Put the lid back on, pick up the pattern and glue the tiles. After that, finally fix the structure.
Finally, the shock absorbers and actuators must be installed in accordance with the manufacturer's instructions.
Features of mounting an electric sunroof
The electric drive is relevant when the hatch is too heavy for the residents of the house to lift, or when, on the contrary, it is too light and children can get into the basement. The mechanics allow at the same time to facilitate the process of opening the door and prevent unauthorized entry into the subfloor.
There are such options:
- Retractable electric drive. For work, you will need a 1 kW motor, a gearbox, guides, fittings and a control unit. When the mechanism is turned on, the door rises up, but no more than 90 degrees. A means of sliding on the motor and a profile on the sash are made. The movement is stopped using touch or optical sensors. In any case, a manual stopper is installed.
- Folding electric drive. The principle of operation of the device is to move the hatch horizontally. This technology is more convenient, more reliable, but more complicated. Guides are made on the floor and rollers on the door. You will also need an engine and stop devices. The downside is that it will not work to make such a structure hidden, since the rails will remain on the surface.
Both projects have their own characteristics and the right to life. The choice is determined by the priorities of the owners and the place of installation of the hatch.
After manufacturing, testing and final design of the manhole, it may turn out that its cover sags a little. In this case, it is enough to make an additional frame. If it is a tree, planks are screwed to the flooring with rigid fastening to the frames. The material must be well dried and then impregnated with a hydrophobic agent. Corners are welded onto a metal plate, also with fixation to the frame. After installation and polishing, the parts are painted to match the color of the cover.


