The barn is one of the important outbuildings on the site, used for storing inventory. They are one of the first to start building it. To quickly get a serviceable building, spending a minimum of money, you can build a 3x6 frame shed with your own hands.
Which version of the barn to choose for a summer residence

You can build a utility block in the form of a capital structure made of block materials - foam block or brick. Such a building is reliable, but it should not be erected alone without special skills. It will take more time to build walls with masonry. You can also pour the foundation made of reinforced concrete yourself and install a container on it that will act as a utility block.
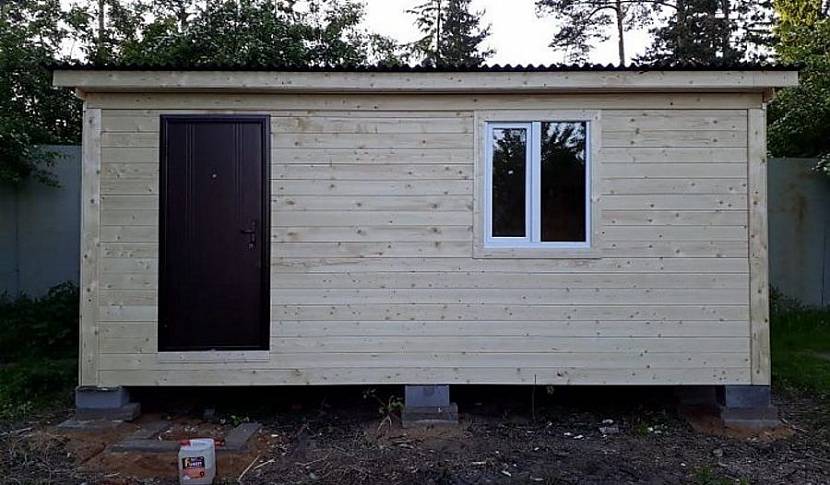
If you want to build a building from scratch, the best option is to make a frame shed with a pitched roof with your own hands. It is easy and quick to build, does not require shrinkage, and you can put household and garden tools into it immediately after work is completed. The costs in this case will be less than when creating a structure from blocks.
Before building a barn, it is important to choose the right place. It is better to build the structure on an area not intended for planting. It is also important that this is not a lowland: in such places a lot of moisture accumulates during periods of heavy rains and melting snow. If it is planned to bring electricity or other communications into the shed, it is important that its location allows this.
The best option for the location of the building is the south or southwest side. The problem of insufficiently even relief in most cases is solved by leveling with earth or sand, so you should not ignore such places if the soil is not stony or pronounced heaving.
Optimal design of a wooden shed 3x6
The roof of a 6 by 3 shed is usually made single-pitched. It is easy to equip, it serves for a long time, if you make a sufficient slope and choose the right materials.
There is one nuance here - when constructing such a roof, the correct orientation of the building relative to the wind rose is important to prevent rain from flowing under the upper overhang and pediment parts. The average tilt angle is 20-30 degrees. In rainy areas, the slope is made taller. The difference between the heights of both sides is calculated based on the angle of inclination and the length of the corresponding side forming the leg of the right angle.
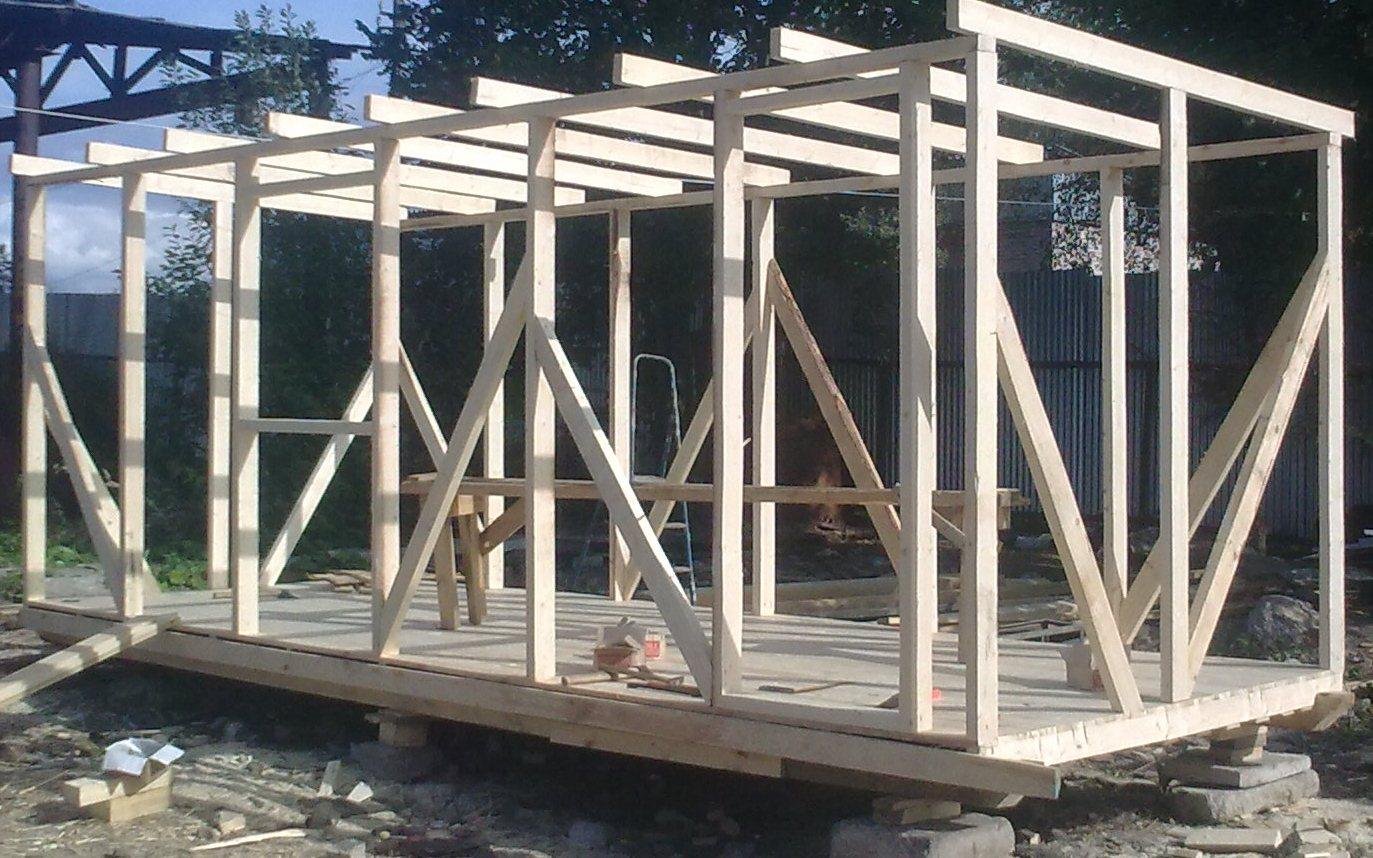
The basis of the structure of such a building is a frame. Due to the light weight of the building, there is no need to fill a solid foundation. Usually, columnar supports are used, which can be laid out from a cinder block or made from a concrete mixture poured into the formwork. At the end of solidification, prepare the lower strapping and install vertical racks. The frame of the barn is made of timber and boards. To reduce exposure to moisture, all wood components must be well dried, treated with antiseptic and flame retardant compounds. Walls can be sheathed with OSB boards - this material is very easy to cut and install. Suitable for this purpose and boards treated with antiseptic impregnation.
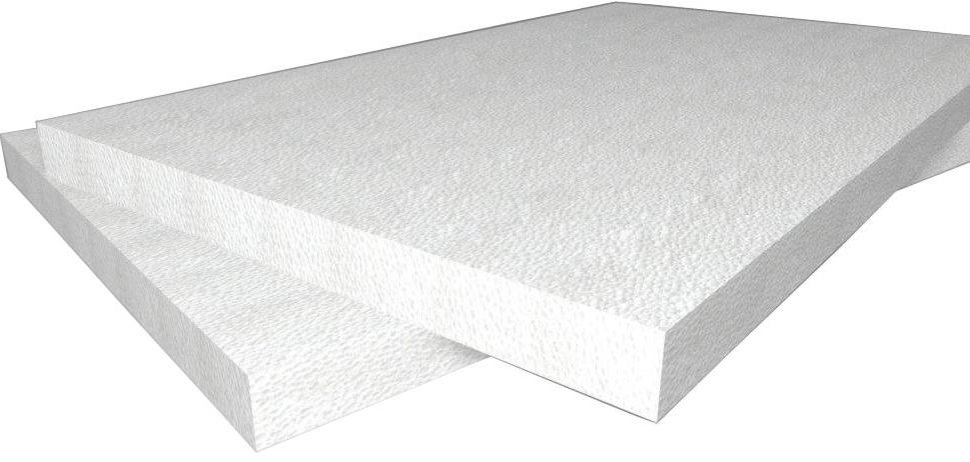
You can insulate the structure with foam. Decking and other metal coatings are good for arranging the roof. For wall cladding, they are used if the frame is welded from shaped pipes.
The optimal choice of some design features is determined by weather conditions, in particular the presence or absence of strong winds. With the correct execution of the foundation, a self-assembled frame wooden shed can withstand gusts of 20-25 m / s.
If the weather in the region is not windy, it is enough to install vertical supports made of beams and boards when building walls. When building a shed in places that are characterized by strong gusts, the racks are strengthened by means of side braces.
Similar restrictions are associated with roofing work. In a region with calm weather, you can build a roof without floor beams, but the harness and Mauerlat will then have to be supported by additional longitudinal supports made of bars. Windy areas require appropriate design changes. It is reinforced with ceiling beams and support elements mounted to the rafters in their middle part.
Drawing of a shed with a pitched roof
Since the barn is a household building and heating and water supply (and in some cases, electricity) are not installed in it, a ready-made standard project is usually suitable for performing the work.
Sometimes the homeowner wants to make design changes to expand the functionality of the building or to harmonize with the design of other buildings on the site. In this case, the barn is designed independently.
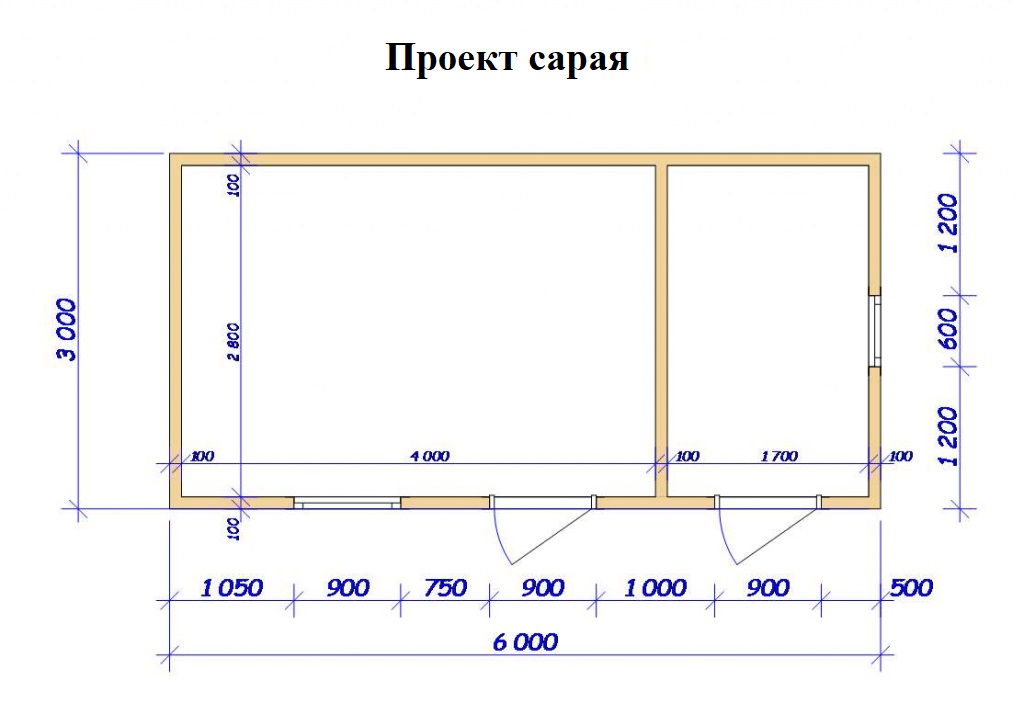
Drawings will allow you to prepare a list of the necessary materials and calculate their quantity, as well as make an estimate.
A typical utility block frame with dimensions of 3x6 m has a height of 2 m. In this case, the upper point of the rafters is 2.7 m from the floor.
The procedure for performing work when erecting a frame shed
To erect a frame shed with a pitched roof with your own hands, boards and beams 6 m long are used. Some of them are sawn in accordance with the dimensions of the building. The frame is assembled from material with a cross section of 50x100 and 50x150 mm. For cladding, boards with a thickness of 3 cm, special plates or panels are suitable. It is best to use black self-tapping screws as fasteners. If they are not there, you can take a corner and simple nails.
Work instructions:
- They start with clearing the site and removing the fertile soil layer. Supports are installed at the corners of the building and around the perimeter with a step of 1.5 m. Small pits under them are made 15 cm deep. A sand-crushed stone pillow is organized at the bottom, and then cinder block pillars are formed on the masonry mortar. Before proceeding to further work, they must be kept for a day.
- A strapping bar is installed on the waterproofed posts. The joints are reinforced with self-tapping screws screwed into the wood at different angles.
- Vertical racks are mounted on the harness. Temporary braces are used for strengthening. After that, the top harness is organized.
- The floor is covered with tongue-and-groove boards. The walls are clad with the selected material and thermal insulation is arranged. To do this, thin slats are stuffed on the inside and a layer of foam plastic 10 cm thick is placed between them. From above it can be covered with plywood.
- The Mauerlat and the building's truss system are being equipped. The areas between the beams are filled with short planks. They fix the rafters so that the latter do not move horizontally.
- The rafters are sewn up with a sheathing board. A waterproofing film is placed on it. Its edges are nailed to the top of the walls of the building.
Then the roofing material is laid. Profiled sheeting is perfect for this, fixed with special self-tapping screws with silicone washers. They begin to lay it from the bottom of the roof. Installation is carried out with an overlap of 2 waves. In this case, the overlap on the bottom sheet has a size of 0.15-0.2 m. From the side parts, strips are mounted to protect the structure from moisture and wind infiltration.
Sometimes they prefer to make the frame without insulation.In this case, OSB, lining and edged board are suitable for walls.