Climatic technology is designed to make life comfortable, providing coolness in the summer heat. The cost of split systems is quite high, and taking into account the installation by specialists from the service, it turns out to be unaffordable for ordinary consumers. You can save money if you buy an air conditioner out of season, and do the installation yourself.
Do-it-yourself air conditioner installation
 Do-it-yourself installation of a split system takes place in two stages: preparation (choosing a place, searching for tools, buying consumables) and installation. The work is carried out in strict accordance with the rules and technical requirements. Miscalculations and mistakes of installers are the main reason for the breakdown of climatic equipment. Before starting the installation, you should understand the device and the principle of operation of the air conditioner.
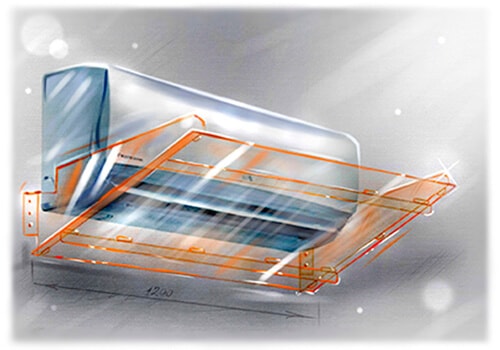
The system consists of two blocks:
- external (condenser) has a compressor that changes the aggregate state of the refrigerant;
- internal (evaporator) with the help of a fan drives air through a heat exchanger cooled by freon.
The units are connected by a copper pipe line through which the refrigerant circulates.
The efficiency of the equipment depends on the correct placement of the air conditioner modules and high-quality sealing of the joints and joints of the pipeline.
A quick guide for installing a split system with your own hands includes the following points:
- Selection and preparation of a place for the installation of an external and internal air conditioner module.
- Installation of the outdoor unit.
- Installation of the indoor unit.
- Laying communications: freon line, drain hose, electric cable.
- System evacuation and test run.
Installation tools
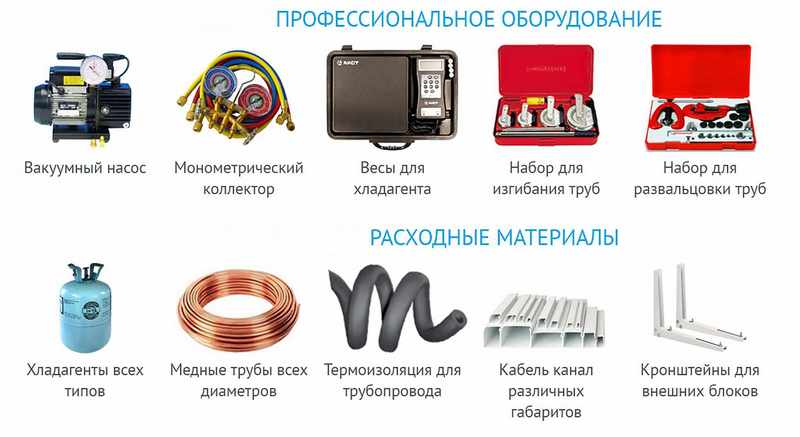
- puncher;
- drill;
- locksmith set (keys, screwdrivers, level and more);
- Vacuum pump;
- gauge manifold;
- rolling;
- pipe cutter.
In the process of self-installation, you cannot do without consumables:
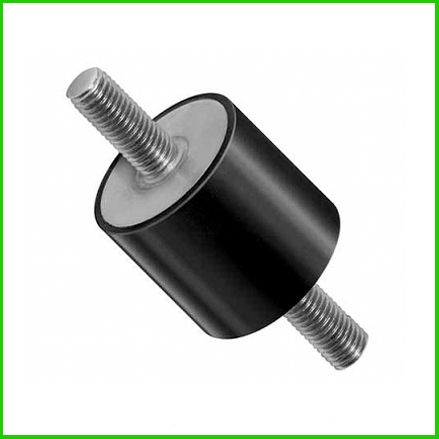
- brackets and hardware for the outdoor unit;
- 2 copper thick-walled pipes with a footage equal to the length of the route plus a margin of 30 cm;
- electric cable with a cross section of 1.5-2.5 mm2;
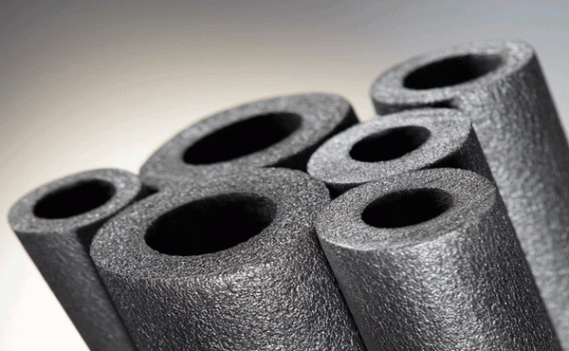
- thermal insulation materials in the form of a sleeve for a freon line;
- reinforced tape.
Choosing a place for the indoor and outdoor unit
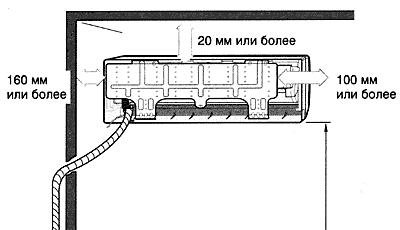
When choosing a place for installing the units, technical requirements are observed and the possibilities of subsequent maintenance are ensured. There are no special problems with the location of the indoor module. Installation rules:
- 15 cm from the ceiling;
- no closer than 150 cm from large objects that impede the flow of air;
- away from heating appliances;
- do not cover the unit with curtains and curtains;
- the ingress of cold air on the bed and workplace should be avoided.
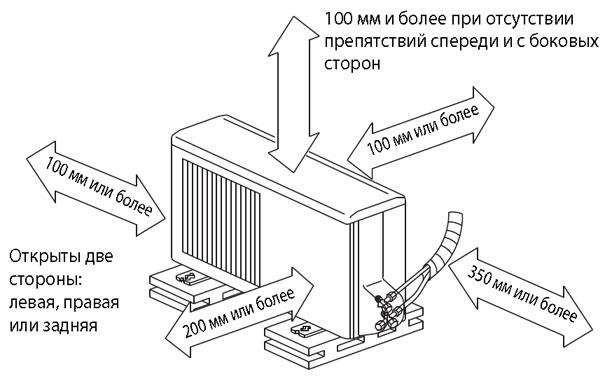
- on the first floor, the distance from the ground is at least 2 m;
- the module cannot be installed on the sunny side, near trees;
- the distance from the rear panel to the wall 15-20 cm is necessary for the removal of hot air;
- the support must support the weight of the outdoor unit.
Do-it-yourself installation of the air conditioner is performed not only near the window, but also on the wall or parapet of the balcony.For apartments in high-rise buildings, this is the best option. Reduces the risk of injury during installation, and maintenance is problem-free. The balcony should be unglazed or have wide opening frames.
When choosing installation sites, the length of the route must be taken into account. It is not recommended to make the pipeline more than 7 m and less than 3 m. Additional filling with freon will be required, heat losses will increase. The best option is to place parts of the air conditioner on one wall or on adjacent ones.
Outdoor unit installation
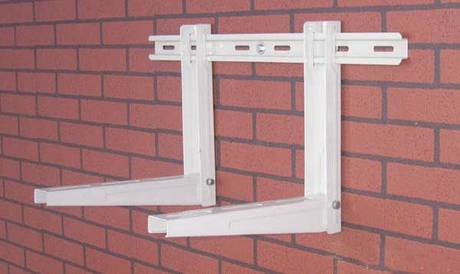
The outdoor unit of the air conditioner is fixed with metal brackets. The supporting elements are selected according to the weight and model of the split system. The safety margin should exceed the recommended load by 2 times. Reliable fastening with minimal vibration is possible only on a level surface. Do not install the unit on insulation, fixing is done to the wall.
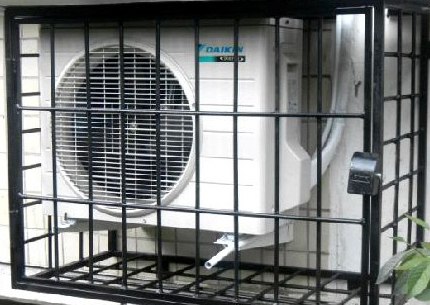
Pre-marking is performed and holes are drilled for dowels. The brackets are mounted horizontally. The block is fixed on the supports with 4 bolts. In a private house, equipment is not exposed to the danger of damage or theft, and it is better to install an anti-vandal grill on the ground floor of a multi-storey building.
Indoor unit installation
After the installation of two blocks, a hole is knocked out in the wall for the freon line, drainage and electric cable using a perforator. Its diameter is at least 45 mm. A slope towards the street must be formed. To protect the pipes from damage, a sleeve is inserted into the hole.
Electrical wiring connection
It is recommended to lay a separate cable from the switchboard to the air conditioner with the installation of the machine. A copper wire is selected, the number of cores depends on the type of connection: single-phase - 3, three-phase - 5. For low-power models, you can use the existing outlet. In the documents of the air conditioner there is an electrical diagram showing the location of all elements. Before starting the connection, it is carefully studied.
A cable connecting the modules is laid between the indoor and outdoor unit. It is placed in a protective corrugated tube. The ends of the cores are stripped and attached to the terminals of the block. The ground wire is marked separately. Having connected the blocks according to the scheme, they check the operation of the device.
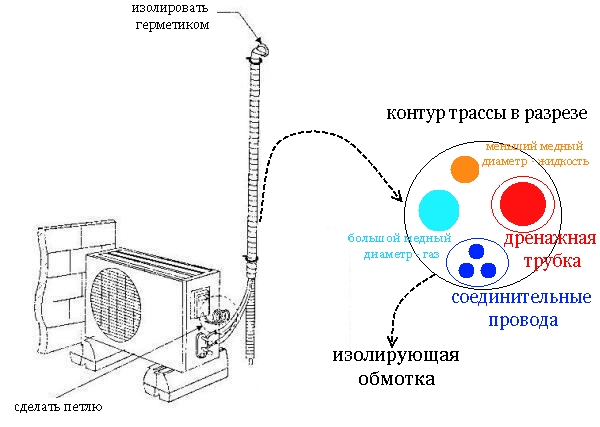
Laying of freon line and drainage
The refrigerant, which is responsible for heat removal, circulates in the system along the route of copper pipes. The material is sold in bays. A part is cut off along the line of the line, taking into account a margin of 20-30 cm. A pipe cutter is used for work. The tool cannot be replaced with a hacksaw, the cut will be rough. Any unevenness in the pipes provokes a freon leak. There is also the possibility of copper shavings getting inside. At the time of installation work, the edges of the products are closed with plugs.
Communication is arranged in two ways: hidden or open. In the first case, a strobe is cut along the marking line from the air conditioner to the hole in the wall. This option is optimal at the stage of repair, otherwise it makes no sense to perform dusty and time-consuming work. The main pipes are laid along the wall and hidden behind a decorative plastic box.
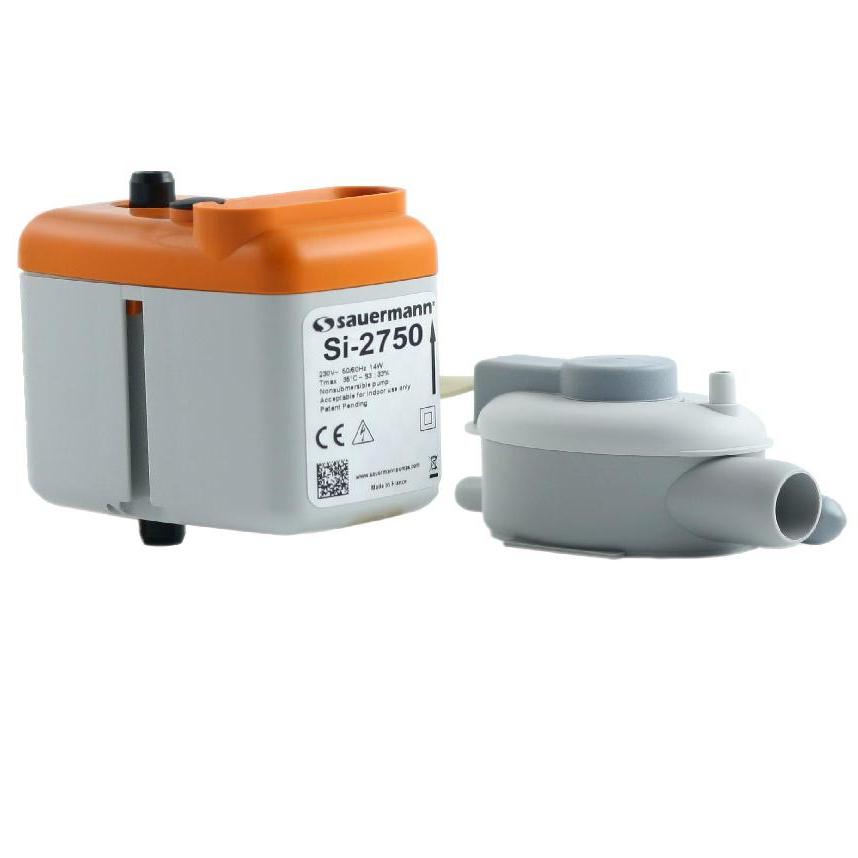
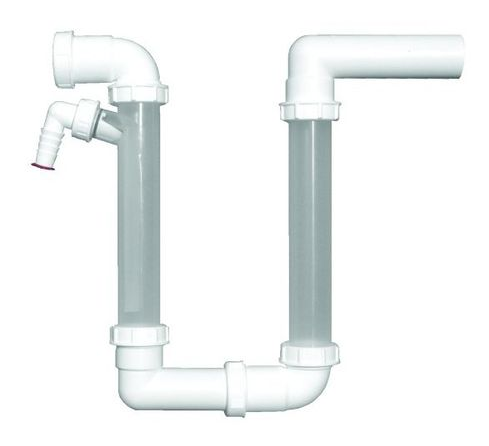
The easiest way to organize the drainage of condensate is to take the drain hose outside. If it is impossible to carry out the procedure, the liquid is sent to the sewer. In this case, a siphon is installed to cut off unpleasant odors.
Installation of the drainage pipe is carried out with a slope towards the moisture outlet, sagging and rises are not allowed. The end of the hose should be located 60-80 cm from the wall so as not to erode the structure.
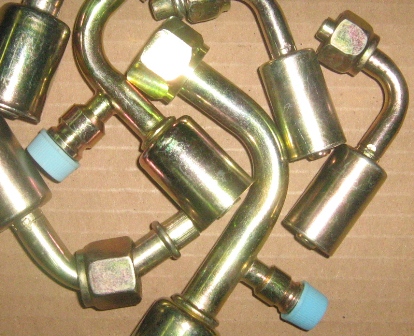
The components of the communications are connected into a common bundle with the help of adhesive tape, in this state they are dragged through the hole. Nuts are used to connect the copper pipes to the service fittings of the blocks. When the connection ports of the indoor unit are opened, nitrogen comes out, this is normal. The union nuts are tightened with a wrench, the soft metal ensures a tight connection. The pipes are connected to the outdoor unit in the same way.
System evacuation
The evacuation procedure removes air, dust particles and moisture from the system. For its implementation, a special pump is connected to an external unit through a gauge manifold. The process takes 20-30 minutes. After the pressure gauge needle drops to -1 Bar, the equipment is turned off. Monitoring is carried out for 30 minutes, if the pressure does not change, the system is sealed and ready to be filled with freon.
A vacuum pump is an expensive equipment that makes no sense to purchase for the installation of one split system. Some craftsmen replace the evacuation of the track by blowing nitrogen or freon. In this case, moisture remains, provoking an early breakdown of the compressor. To perform the installation efficiently, a vacuum pump is rented.
Refrigerant filling and system testing
To start freon, a hex wrench is required to open the valve on the liquid port. The refrigerant will begin to fill the system with a characteristic hiss. After filling, the hose is removed from the gas connection. Part of the refrigerant comes out. The work is carried out in compliance with safety measures - in gloves and goggles. The port is closed with a plug. Installation is completed, it remains to test the air conditioner.
When choosing to install a split system with your own hands, do not forget that the store's warranty for equipment is lost. Service in the service center will be paid.